")
Welcome to my cozy kitchen where I whip up the most delicious and smooth fudge icing recipe. This super creamy fudge icing is not just yummy but also quick and easy to make! Whether you’re making brownies, cakes, or even a peanut butter fudge delight, this recipe will be your new favorite. Let’s get started on creating the best fudge icing ever – full of chocolate goodness and a perfect touch of sweetness!

| Prep Time | Cook Time | Total Time | Servings | Difficulty Level |
|---|---|---|---|---|
| 10 mins | 20 mins | 30 mins | 12 servings | Easy |
A Little Story About My Fudge Icing Recipe
Hi friends! 😊 I still remember the first time I made my fudge icing recipe – it was a rainy afternoon when I needed something sweet and fun to cheer me up. My grandma used to make similar frostings when I was little, and the rich taste of condensed milk mixed with warm chocolate brought back so many lovely memories. I decided to recreate that magic with a twist: I added chocolate chips for a delightful crunch and extra flavor! Every time I make this fudge icing recipe for brownies or add a swirl to a peanut butter cake, I feel like I’m sharing a piece of my heart with my loved ones. This recipe is not only easy to make but also super versatile—perfect for any celebration! 🎉 I hope you enjoy making it as much as I do and that it brings you just as many smiles and happy memories. Let’s get fudgy together!
Explore More Delicious Recipes:
15 Healthy Camping Meals Even Kids Can Help Make – Easy Ideas & Fun Tips!
Easy healthy camping meals and snacks for every outdoor trip—fun, friendly, and perfect for the whole family!

15 Easy Mediterranean Meals You’ll Want to Try Tonight
A super-friendly guide to 15 easy Mediterranean meals—with simple steps, kid-friendly options, and Amazon kitchen tool picks perfect for busy families.
15 Fun and Easy Cold Soup Recipes for Summer ☀️
Learn to make 15 easy cold soup recipes for summer with fresh ideas, cool tips, and Amazon tools—perfect for hot days and Pinterest sharing!


Why You’ll Love This Recipe

You’re going to love this fudge icing recipe because it’s incredibly easy to make and tastes like a dream! Whether you need a fudge frosting for cake icing recipe or a chocolate fudge icing recipe for cake, this recipe has you covered. It’s rich, smooth, and pairs perfectly with almost any dessert, like brownies or even a peanut butter cake icing. The best part is that it uses condensed milk, making it super creamy without too much fuss in the kitchen. Plus, the added chocolate chips give it an extra burst of texture that I just can’t get enough of! So, if you’re in the mood for a simple, satisfying treat, this recipe is your new go-to dessert topper. It’s a win for family gatherings or even a quiet night in with your favorite show. Yum!


Ingredient List with Tips & Substitutions

Below is a list of ingredients for our fudge icing recipe. Remember, this list is without amounts. For the complete recipe with amounts and step-by-step directions, scroll down to the recipe card section of the post for the ingredients with amounts included and for more complete directions.
- Chocolate – the richer, the better!
- Condensed milk – makes it super creamy.
- Unsalted butter – for a smooth texture.
- Sugar – to add just the right amount of sweetness.
- Salt – a pinch to balance flavors.
- Vanilla extract – for a hint of magic!
- Chocolate chips – for that delightful crunch.
Print This Recipe for Future Reference
Possible Substitutions and Alternative Ingredients
| Original Ingredient | Possible Substitution | Notes/ Tips |
|---|---|---|
| Chocolate | Cocoa powder + extra butter | Use high-quality cocoa for best flavor. |
| Condensed milk | Coconut milk condensed version | Great for a dairy-free twist. |
| Unsalted butter | Vegan butter or margarine | Works well for a vegan version. |
| Sugar | Honey or maple syrup | Adjust sweetness to taste. |
| Vanilla extract | Almond extract | Creates a unique flavor profile. |
| Chocolate chips | Chopped nuts or dried fruit | For extra texture variation. |


Equipment Checklist
Here’s a checklist of tools and appliances that I find super helpful when making my fudge icing recipe:
| Equipment | Purpose |
|---|---|
| Heavy saucepan | For melting and stirring ingredients. |
| Wooden spoon | For smooth stirring while cooking. |
| Measuring cups and spoons | To get each ingredient just right. |
| Whisk | To mix in air for a smoother texture. |
| Spatula | For scraping every bit of delicious icing. |
| Mixing bowl | To combine ingredients before cooking. |
| Cooling rack | To let your icing cool evenly. |

- DURABLE SAUCEPAN: Durable hard anodized saucepan construction promotes even heating
- OVEN SAFE: Nonstick saucepan is oven safe to 400 degrees F and suitable for all stovetops, except induction
- ENHANCED NONSTICK: Superior nonstick provides effortless food release and easy cleanup

- High-Quality Stainless Steel:Mixing bowls Crafted from durable, food-grade stainless steel, these mixing bowls are resis…
- Airtight BPA-Free Lids:Each bowls for kitchen is equipped with a BPA-free airtight lid that seals in freshness, preventi…
- Versatile & Multi-Size Set:The bowls for kitchen includes 7 or 18 nesting bowls in various sizes (ranging from 1.5 to 7 …
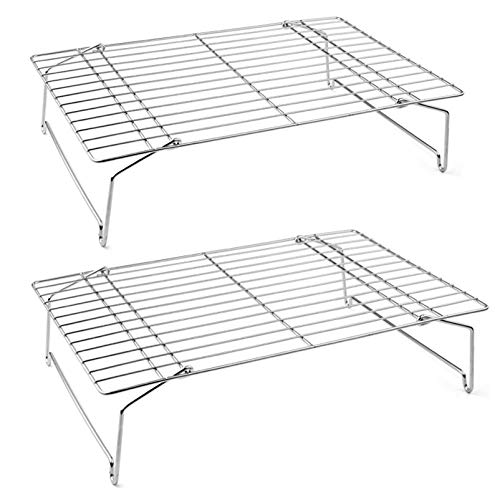
- ▶PREMIUM MATERIAL◀ P&P CHEF cooling rack are made of 100% pure stainless steel, Well construction for securely holding h…
- ▶OVEN & DISHWASHER SAFE◀ Elevated feet and equidistant wires promote optimal air circulation for bake evenly and cool qu…
- ▶FLEXIBLE FEET◀ The flexible feet can be swung over 90°, Come with 3.5-inch height when it opened fully, Make the rack s…
Step-by-Step Guide to Make Your Fudge Icing

Follow these easy steps to make your fudge icing recipe. I promise it’s super fun and not too hard at all!
- Prepare Your Ingredients
First, gather all your ingredients and measure them out. This step ensures you don’t miss a thing. It’s always more fun to cook when everything is ready ahead of time.
Pro Tip: Use room temperature butter. It mixes better and gives you a smoother icing!
- Melt the Butter and Chocolate
In your heavy saucepan, melt the unsalted butter over low heat. Once melted, add your chocolate pieces. Stir gently until the mixture is completely smooth and the chocolate is melted. - Add the Condensed Milk
Slowly pour in the condensed milk while stirring continuously. This is the secret to making the icing super creamy and rich. Keep stirring until the mixture is completely combined and smooth.
Pro Tip: Stir slowly and steadily to prevent burning. Enjoy the melty magic!
- Mix in the Sugar, Salt, and Vanilla Extract
Now, add your sugar, salt, and vanilla extract. Mix well until you feel the icing is silky and full of flavor. This step brings all the sweet and savory tastes together perfectly. - Fold in the Chocolate Chips
Finally, gently fold in the chocolate chips. They add a fun crunch and extra bursts of chocolate in every bite. Make sure they are evenly distributed throughout the icing. - Cooling and Final Touches
Remove the saucepan from the heat and let the icing cool for a few minutes. This cooling time lets it thicken up nicely for spreading or drizzling. Now, your fudge icing is ready to adorn your favorite desserts!
Pro Tip: If your icing starts to harden too quickly, warm it gently on the stove over low heat until it reaches the right consistency.
Watch the video tutorial here!
Pro Tips for Perfect Fudge Icing Recipe

Here are some extra tips to ensure you get the best outcome with your fudge icing recipe:
- Quality Ingredients: Always use the best chocolate and condensed milk you can find. Great quality makes a big difference in taste!
- Consistent Stirring: Stirring slowly and consistently helps the mixture become super smooth. This is key when making any chocolate fudge icing recipe for cake or brownies.
- Temperature Control: Keep the heat low. High heat can burn the sugar and spoil the texture.
- Customization: Try adding a sprinkle of sea salt on top for a gourmet touch or a dash of cinnamon for extra warmth!
- Experiment: Whether it’s for cake icing peanut butter fudge recipe or caramel fudge icing recipe, don’t be afraid to get creative by mixing in different types of chocolate or even a hint of coffee for a mocha twist.
- Patience is Key: Letting your icing cool a bit before serving helps it thicken to the perfect spreading consistency.
These tips help me every time, and I promise they’ll work wonders in yours too. Remember, each small detail counts when crafting an award-winning icing that makes your dessert stand out!
Serving Suggestions and Storage Tips

Serving your freshly made fudge icing is just as fun as making it! I love to drizzle it over brownies or spread it thickly on a cake for extra flavor. You can also serve it as a dip for fruit or even spread it on toast for a sweet breakfast treat. For a party, try using it to make mini fudge cupcakes that will have everyone asking for more!
As for storage, you can keep your chocolate fudge icing recipes in an airtight container in the refrigerator for up to a week. When you’re ready to use it, let it sit at room temperature for 10 minutes so it softens up a bit again. If you ever make too much, you can also freeze it! Just thaw it in the fridge overnight and gently reheat on low heat. This icing is super versatile for meal prep and can easily be doubled or halved based on your needs.
Meal prep tip: Prepare your icing ahead of time and store it in small jars. They make perfect grab-and-go snacks or dessert toppings. Enjoy your kitchen adventure with this delightfully easy recipe!
![[10 Pack] Glass Meal Prep Containers, Food Storage Containers wit...](https://m.media-amazon.com/images/I/51KtYzS-grL.jpg)
- If you find any damaged or defective product after receiving it or during daily use, please contact us.
- [10 PACK GLASS MEAL PREP CONTAINERS] Set of 20 Piece (10 lids & 10 containers) : The containers are versatile to meet yo…
- [OVEN, MICROWAVE(Not the lids), DISHWASHER SAFE /FREEZER SAFE] Our glass storage containers are made from high quality b…

- Size/Color: Package includes 200 unbleached pieces of tulip cupcake liners in total. The bottom diameter of these cupcak…
- Reliable Material, Reliable Brand: Quality is our top priority. The paper of Bake Choice cupcake liners is from Europe. …
- Easy to use and Versatile: Tulip cupcake liners are a great choice to upgrade your cupcake. Compared with normal cupcake…

- High-Grade Glass: Made with premium BPA-free and lead-free food-grade glass, ensures long-lasting durability and offers …
- Unbeatable Airtight Sealing: The specially designed lid ensures an airtight seal, keeping contents fresh for longer and …
- Stackable Design: The unique recessed top allows for easy stacking, optimizing storage space without risking stability. …
Nutritional Breakdown
Below is the nutrition facts table for a serving of our fudge icing recipe, packed with flavor and a little bit of magic!
| Nutrient | Amount per Serving |
|---|---|
| Calories | 150 kcal |
| Total Fat | 8 g |
| Saturated Fat | 5 g |
| Cholesterol | 20 mg |
| Sodium | 60 mg |
| Total Carbohydrates | 18 g |
| Sugars | 14 g |
| Protein | 2 g |
Health Benefits:
This delicious fudge icing does contain a bit of sugar and fat, but it also brings a wonderful sense of joy and comfort in every bite! The condensed milk and chocolate provide a quick burst of energy, making it a perfect treat during study breaks or gatherings with friends and family. Enjoy it in moderation as part of a balanced diet!


Super Creamy Fudge Icing Recipe
Equipment
- Heavy saucepan: For melting and stirring ingredients.
- Wooden spoon: For smooth stirring while cooking.
- Measuring cups and spoons: To measure ingredients accurately.
- Whisk: To ensure a smooth texture.
- Spatula: For scraping every bit of the icing.
- Mixing bowl: To combine ingredients before cooking.
- Cooling rack: For cooling the icing evenly.
Ingredients
Chocolate
- Amount: 8 oz
- Notes: Use high-quality chocolate for the best flavor.
Condensed milk
- Amount: 1 cup
- Notes: This will make the icing super creamy.
Unsalted butter
- Amount: 1/2 cup
- Notes: For a smooth texture.
Sugar
- Amount: 1 cup
- Notes: Adjust to taste for sweetness.
Salt
- Amount: 1/4 teaspoon
- Notes: Just a pinch to enhance flavors.
Vanilla extract
- Amount: 1 teaspoon
- Notes: Adds flavor depth.
Chocolate chips
- Amount: 1/2 cup
- Notes: For texture and added chocolate flavor.
Instructions
Prepare Your Ingredients: Gather all ingredients and measure them out.
Melt the Butter and Chocolate: In a heavy saucepan, melt unsalted butter over low heat. Add chocolate pieces and stir gently until smooth.
Add the Condensed Milk: Slowly pour in the condensed milk while continuously stirring until fully integrated.
Mix in Sugar, Salt, and Vanilla: Add sugar, salt, and vanilla extract. Stir until the mixture is silky and smooth.
Fold in Chocolate Chips: Gently fold in chocolate chips to distribute them throughout the icing.
Cool the Icing: Remove from heat and let the icing cool for a few minutes. It will thicken as it cools.
Video
Notes
Variations: Try different chocolates or add a sprinkle of sea salt for an extra kick!
Related Recipes
If you loved this fudge icing recipe, why not check out some of my other fun treats? Try my caramel fudge icing recipe for a twist on the classic, or indulge with a chocolate butter frosting that’s perfect for birthdays. I also have a delightful cake frosting peanut butter fudge recipe that will make your cake extra special. Each recipe is designed to be easy and fun for anyone to try. Don’t forget to save and share your favorites on Pinterest for more kitchen inspiration!
Leave a comment below and let me know which recipe you’d like to try next! And if you pin this on Pinterest, you’ll always have the perfect recipe handy for your next dessert adventure. 🎉

Essential Tools
For perfect results every time, I recommend having these essential tools in your kitchen. They simplify the process and make sure your fudge icing turns out just right.
- Heavy Saucepan: Helps in evenly melting your ingredients.
- Wooden Spoon: Great for constant stirring without scratching your cookware.
- Measuring Cups and Spoons: Ensure each ingredient is added in perfect proportion.
- Whisk: For a smoother blend of ingredients.
- Spatula: To scrape every delicious bit from the bowl.

- MAKE RICH, CREAMY FROTH IN SECONDS: We coffee lovers are serious when it comes to our coffee. The Milk Boss Frother give…
- EASY TO CLEAN AND STORE: The durable convenient metal stand gives easy access for foamy goodness in seconds. Cleanup for…

- 1. High Quality: Our 5-piece silicone set is supported by high quality 100% food-grade silicone material, no-slip, lead-…
- 2. Durable and High Temperature Resistant : This silicone spatula set can withstand temperatures ranging from -104°F to …
- 3. Versatility: Different sizes of silicone spatulas can meet your different daily needs for a variety of cooking and ba…
Recommended Appliance Comparison
| Tool/Appliance | My Pick | Alternative |
|---|---|---|
| Heavy Saucepan | All-Clad Stainless Steel Saucepan | Cuisinart Chef’s Classic Saucepan |
| Wooden Spoon | Le Creuset Wooden Spoon | OXO Good Grips Wooden Spoon |
| Measuring Cups & Spoons | Prepworks Pro Measuring Set | Cuisipro Measuring Cup & Spoon Set |
| Whisk | KitchenAid Stainless Steel Whisk | OXO Good Grips Balloon Whisk |
Using these tools helps me achieve the best texture and flavor in each batch of fudge icing recipe that I make. They’re absolute kitchen heroes!

- Set includes: 1-Cup, 2-Cup, and 4-Cup Angled Measuring Cups
- Patented angled surface allows you to read measurements from above
- Eliminates the need to fill, check and adjust
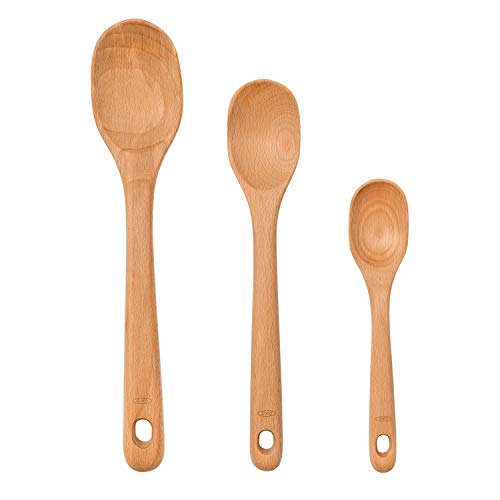
- Made of solid beech wood
- Safe for non-stick cookware
- Natural oil finish
FAQs
Q1: Can I use cocoa powder instead of melted chocolate?
A1: Yes! You can mix high-quality cocoa powder with extra butter for a tasty variation. Just stir well to dissolve the cocoa.
Q2: What can I substitute for condensed milk?
A2: Try using a coconut milk condensed version for a dairy-free option, which also gives a unique tropical flavor.
Q3: How do I know when my icing is the right consistency?
A3: Look for a smooth, thick, and glossy texture. If it’s too runny, let it cool or warm it gently until it reaches a perfect spreadable state.
Q4: Can I prepare this icing ahead of time?
A4: Absolutely! Prepare the icing and store it in an airtight container in the fridge for up to a week. Let it come to room temperature before using.
Q5: What desserts pair best with this fudge icing?
A5: It’s perfect over brownies, cakes, cupcakes, or even as a dip for fruits and cookies. Enjoy mixing and matching!
Conclusion

I hope you enjoyed this fun and detailed guide to making my Super Creamy Fudge Icing Recipe! This fudge icing recipe is a labor of love from my kitchen to yours. It’s a simple yet enchanting recipe that elevates any dessert, whether it’s a chocolate fudge icing for cake or a delightful fudgy icing chocolate frosting on brownies. I encourage you to try this recipe at home, experiment with your favorite ingredients like cake icing peanut butter fudge recipe ideas or old fashioned fudge twists. Share your beautiful creations in the comments below and don’t forget to pin this recipe on Pinterest – it’s perfect for your next dessert party! Your feedback and creative twists always inspire me to bring more frosting recipes easy tips and delightful treats to you. Happy cooking and enjoy every yummy bite!

")


0 Comments