")
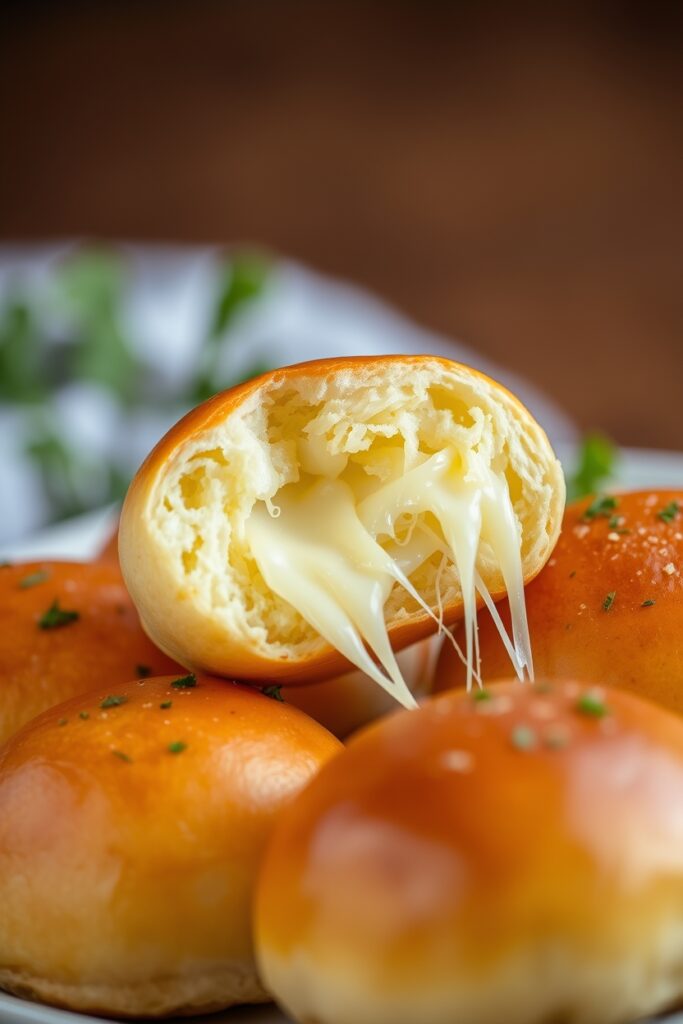
Get ready to experience the ultimate Cheese Bombshell that melts right in your mouth. These Pillsbury Biscuit Garlic Butter Cheese Bombs are the perfect blend of gooey cheese, garlic butter, and flaky biscuit dough, creating little pockets of delight perfect for any snack or appetizer. Crunchy on the outside and bursting with melty cheese on the inside, they are sure to be your new favorite comfort food!
| Prep Time | Cook Time | Total Time | Servings | Difficulty |
|---|---|---|---|---|
| 10 minutes | 12-15 minutes | 25 minutes | 8-16 | Easy |
A Delicious, Cheesy Surprise!
Hey friends, I’m so excited to share this amazing Garlic Cheese Bombshell recipe with you today! 😊 It all started when I was looking for a quick and fun snack idea on a lazy Saturday afternoon. I found a can of Pillsbury biscuits in my pantry and thought, “Why not transform them into something spectacular?” And so, I created these cheesy little bombs filled with garlic cheese and drizzled with garlic butter that make every bite a delight! I remember serving them at my family’s picnic, and the smiles were endless. These Cheesy Garlic Bites not only taste incredible but also bring back warm memories. They’re simple, tasty, and perfect for sharing with friends. Trust me, once you try these garlic cheese balls, you’ll be hooked! 😋
Why You’ll Love This Recipe
- 😍 Bursts of Flavor: Every bite is a mix of melty cheese and savory garlic butter.
- 🤗 Easy to Make: This bombe recipe requires minimal preparation and cooks in minutes.
- 🎉 Perfect for Parties: These cheese appetizers are a guaranteed crowd-pleaser at any gathering.
- ⭐ Fun and Versatile: You can serve them as a snack, appetizer, or even a side dish.
- 💖 Family Favorite: They bring back sweet memories and lots of smiles when shared.
Ingredient List (Tips & Substitutions)
Ingredients (No measurements):
- Pillsbury biscuits
- Mozzarella cheese (or your favorite cheese)
- Butter (for that garlic butter glaze)
- Garlic powder (or fresh garlic)
- Italian seasoning
- Salt
- Marinara sauce (for dipping)
- Optional extras: bacon bits, spinach, cheddar, pepper jack, or any mix of garlic cheese varieties
Note: Scroll down to the recipe card section of the post for the ingredients with amounts included and for more complete directions.
Substitutions & Alternatives
| Original Ingredient | Possible Substitutes | Tip/Note |
|---|---|---|
| Pillsbury biscuits | Homemade biscuit dough, crescent roll dough | Adjust bake time accordingly |
| Mozzarella cheese | Cheddar, pepper jack, gouda | Cut cheese into small pieces for easy filling |
| Butter | Garlic butter, vegan butter | Ensure consistency with your flavor preference |
| Garlic powder | Fresh minced garlic | Fresh garlic gives a stronger taste |
| Italian seasoning | Dried oregano or basil | Use what you have on hand |
| Marinara sauce | Ranch, spicy buffalo sauce | Varies the dipping flavor experience |
Equipment Checklist

| Item | Purpose |
|---|---|
| Oven | Baking the cheese bombs |
| Baking sheet | To arrange the bombs for even cooking |
| Parchment paper/Non-stick spray | Prevents sticking |
| Rolling pin or hands | To flatten the biscuits |
| Mixing bowl | To combine melted butter and seasonings |
| Pastry brush | To brush the garlic butter mixture |
| Knife | To cut cheese into cubes (if needed) |
| Tongs (optional) | For handling the bombs carefully |
Step-by-Step Preparation Guide
- Preheat and Prep:
Preheat your oven to 375°F (190°C). Line a baking sheet with parchment paper or lightly spray it with non-stick cooking spray. This step is key for ensuring that the delicate garlic cheese bombshells don’t stick and bake evenly. - Prepare the Biscuits:
Open your Pillsbury biscuit can and gently separate the individual biscuits. Then, using your hands (or a rolling pin for a smoother finish), gently flatten each biscuit until you have a round disc about 3 inches in diameter. This gives you plenty of room to add your gooey cheese filling.
Pro Tip: Don’t over-roll the biscuits—the edges should be a bit thicker so they seal well around the cheese.
- Add the Cheese:
Place a piece of mozzarella or your chosen cheese right in the center of each flattened biscuit. Make sure the cheese is chopped small enough that it melts quickly and evenly. - Seal the Bombs:
Fold the edges of the dough over the cheese, pinching tightly to create a neat, sealed ball. It’s very important to ensure that there are no gaps, as this will prevent the melty cheese from oozing out during baking.
Pro Tip: Press the seams down on the baking sheet to further tighten the seal.
- Prepare the Garlic Butter:
In a small mixing bowl, combine melted butter with garlic powder and Italian seasoning. If you’re feeling extra bold, add a pinch of salt. This garlic butter not only flavors the dough but helps in giving the bombs a beautiful, golden finish. - Brush and Bake:
Arrange the dough balls seam-side down on the baking sheet. Use your pastry brush to generously coat the tops of each bomb with the garlicky butter mixture. Slide the tray into the preheated oven and let bake for 12-15 minutes until they turn a gorgeous golden brown and the cheese inside is perfectly oozy.
Pro Tip: Rotate the baking sheet halfway through for even browning and to ensure every bomb gets that irresistible crispy top.
- Cool and Serve:
Once baked, remove the bombs from the oven and let them cool for a few minutes on the tray. This brief rest allows the cheese to set slightly, making them easier to handle. Enjoy them warm, paired with your favorite dipping sauce such as marinara, ranch, or even a spicy buffalo dip for an extra kick!
Pro Tips for Perfect Garlic Cheese Bombshells
- 🍴 Seal It Tight: Make sure you pinch the dough really well around the cheese to avoid any leaks during baking.
- ⏲ Watch the Clock: Keep an eye on your bombs—overbaking can lead to a dry crust, while underbaking might leave the cheese too runny.
- 🔥 Even Coating: Brush on the garlic butter generously to ensure every bite is infused with flavor.
- 💡 Experiment Boldly: Try different cheeses like cheddar or gouda for a unique twist on the classic cheese appletizers.
- 🌿 Herbal Touch: Sprinkle a little fresh parsley over the bombs after baking to add freshness and color.
- 😋 Serve with Love: These cheesy garlic bites are best enjoyed warm—serve them immediately and watch them disappear!
Serving Suggestions and Storage Tips

You can enjoy these delectable Garlic Cheese Bombshells in many ways. Serve them as a fun appetizer at your next party or as a comforting snack after a long day! They pair wonderfully with a side of marinara sauce, ranch dressing, or any dip that tickles your fancy. You may also slice them open and serve alongside a fresh salad for a well-rounded meal.
If you’re into meal preps, prepare a freezer tray of unbaked bombs. Freeze them on the tray until solid, then store in an airtight container for up to three months. To reheat, simply bake them at 375°F for a few extra minutes until warmed through. Refrigerate any leftovers (in an airtight container for up to 2 days) and reheat in the oven to maintain that perfect crispiness. This makes them a practical and flexible option for any occasion!
Nutritional Breakdown
Here is a nutritional facts table for one serving (approximately one bomb):
| Nutrient | Amount |
|---|---|
| Calories | 180 kcal |
| Total Fat | 12g |
| Saturated Fat | 7g |
| Carbohydrates | 17g |
| Protein | 4-6g |
| Sodium | 350mg |
| Cholesterol | 30mg |
These garlic cheese balls provide a satisfying mix of protein and carbohydrates while delivering the indulgence of gooey cheese and garlic butter. Enjoy the burst of flavor with every bite, knowing you’re treating yourself to a decadent snack occasionally!
Related Recipes
If you love these Cheese Bombshell treats, why not try some other fun recipes? Consider making Cheesy Garlic Breadsticks, Bacon-Wrapped Garlic Cheese Sticks, or even Spicy Jalapeño Garlic Cheese Rolls.
These recipes are just as fun to create and full of delicious flavors that will make your taste buds dance. Share your twists and tag your photos—I’d love to see how you make these cheesy garlic bites your own! Don’t forget to drop a comment below and pin your favorite recipes to Pinterest!
Essential Tools
Essential Tools to Master the Recipe:
- Oven: An efficient, even-heating oven is a must.
- Baking Sheet: A heavy-duty metal or non-stick baking sheet works great.
- Rolling Pin: For flattening the biscuits smoothly.
- Pastry Brush: Perfect for an even coat of garlic butter.
- Mixing Bowl: To combine your melted butter and seasonings.
Recommended Products:
- Amazon Basics Non-Stick Baking Sheet
- Wilton Rolling Pin
- OXO Good Grips Pastry Brush
- KitchenAid Mixing Bowl Set
Comparison Table for Recommended Appliances/Ingredients
| Product | Description | Price Range |
|---|---|---|
| Amazon Basics Non-Stick Baking Sheet | Durable and easy to clean, perfect for even baking | $15 – $25 |
| Wilton Rolling Pin | Lightweight and smooth for unfolding dough | $10 – $20 |
| OXO Good Grips Pastry Brush | High-quality silicone brush for even butter coating | $8 – $15 |
| KitchenAid Mixing Bowl Set | Versatile, durable bowl set for easy mixing | $30 – $50 |
Feel free to check out these essential tools via my affiliate links to ensure you always have the best kitchen gear for every recipe!
FAQ Section
Q1: Can I use a different type of biscuit dough for this recipe?
Yes, you can try homemade biscuit dough, crescent roll dough, or even puff pastry. Just remember that the baking time might need slight adjustments.
Q2: What cheese works best?
Mozzarella is a classic choice because of its melty cheese quality, but cheddar, pepper jack, or a blend of cheeses are great options too!
Q3: How do I prevent the cheese from leaking?
Make sure you seal the dough tightly around the cheese by pressing the edges together firmly. Rolling the seam side down on the baking sheet also helps.
Q4: Can I freeze these cheese bombs?
Absolutely! Assemble the bombs, freeze them on a tray, then transfer to an airtight container for up to three months. Reheat by baking without thawing.
Q5: What dipping sauces complement these bombs?
Marinara sauce is a classic, but you can also try ranch, spicy buffalo sauce, or a zesty garlic aioli for extra flavor!

I hope you enjoy making these Garlic Cheese Bombshell treats as much as I do! They’re not just a recipe; they’re a little packet of joy perfect for any time of the day. Whether you’re serving them at a party, enjoying them as a snack, or sharing them with loved ones, these cheesy garlic bites will spread smiles instantly. I can’t wait to read your comments and see your photos when you pin this recipe on Pinterest. Share your twists, give a thumbs up if you love garlic cheese, and don’t forget to come back for more delicious treats. Happy cooking and stay cheesy! 😋💖

")


0 Comments