")
Hey everyone, are you ready for a super yummy and super easy dinner? These Cheesy Pepperoni Pizza Roll-Ups are like little pockets of pizza joy! Imagine biting into a warm, gooey roll filled with melted cheese and spicy pepperoni – YUM! 😋

| Prep Time | Cook Time | Total Time | Servings | Difficulty |
|---|---|---|---|---|
| 15 mins | 25 mins | 40 mins | 6-8 | Easy Peasy! |
My Pizza Roll-Up Story
Okay, friends, let me tell you—I have a soft spot in my heart for Cheesy Pepperoni Pizza Roll-Ups! It all started on a fun Friday movie night 🎬 when we craved pizza but wanted a twist on the usual. I grabbed some pizza dough, piled on all the good stuff, and rolled it up into a fun, bite-sized treat. The mix of warm, gooey Mozzarella with spicy Pepperoni was a total hit with everyone, especially the kids! From then on, this recipe became our go-to comfort food on busy nights. It’s fun to make, full of flavor, and brings back happy memories of laughter, movies, and togetherness. I hope it brings you the same joy and smiles! 😊
Why You’ll Love This Recipe

- Super Quick & Easy: These Pizza Lasagna Roll Ups are perfect for busy weeknights when you need dinner on the table FAST! 🏃♀️
- Kid-Approved: Little picky eaters gobble these Pepperoni Pizza Lasagna Roll Ups right up! 👍
- Cheesy, Gooey Goodness: Melted cheese in every bite? YES, PLEASE! 🧀
- Fun to Make: Get the whole family involved in rolling up these yummy Lasagna Rolls! 👨👩👧👦
- Party Perfect: Need a crowd-pleasing appetizer? These Pizza Roll-Ups are always a winner! 🥳
15 Healthy Camping Meals Even Kids Can Help Make – Easy Ideas & Fun Tips!
Easy healthy camping meals and snacks for every outdoor trip—fun, friendly, and perfect for the whole family!

15 Easy Mediterranean Meals You’ll Want to Try Tonight
A super-friendly guide to 15 easy Mediterranean meals—with simple steps, kid-friendly options, and Amazon kitchen tool picks perfect for busy families.
15 Fun and Easy Cold Soup Recipes for Summer ☀️
Learn to make 15 easy cold soup recipes for summer with fresh ideas, cool tips, and Amazon tools—perfect for hot days and Pinterest sharing!


Ingredients You’ll Need 🛒

- Pizza Dough
Tip: I like to use store-bought dough for extra convenience! - Pepperoni
Tip: Use turkey pepperoni if you prefer a lighter option! - Shredded Mozzarella Cheese
Tip: This is the key to those perfect, cheesy pulls! - Pizza Sauce
Tip: Use your favorite store-bought sauce or mix your own spices for a twist! - Italian Seasoning
Tip: Adds that extra flavor boost!
Optional Add-Ins:
- Bell Peppers
- Onions
- Mushrooms
- Sausage
Scroll down to the recipe card section of the post for the ingredients with amounts included and for more complete directions.
Print This Recipe for Future Reference
Equipment Checklist

| Equipment | Notes |
|---|---|
| Baking Sheet | |
| Parchment Paper | Makes cleanup super easy! |
| Mixing Bowl | |
| Pizza Cutter/Sharp Knife | For slicing those perfect rolls! |
| Measuring Cups & Spoons |
Let’s Make Some Pizza Roll-Ups!

Step 1: Prep Work!
Preheat your oven to 375°F (190°C) and line your baking sheet with parchment paper. This little step makes cleaning up a breeze!
Step 2: Roll It Out!
Gently roll out your pizza dough on a lightly floured surface into a 12×16 inch rectangle. If the dough is a bit stubborn and springs back, let it rest for a few minutes so it relaxes. It’ll be much easier to roll out!
Step 3: Load Up the Flavor!
Spread a thin layer of pizza sauce evenly over the dough. Next, sprinkle a generous layer of shredded mozzarella cheese. Now, add the pepperoni slices in a single layer. If you feel like adding extra flavor, toss on some of your favorite toppings like mushrooms or bell peppers!
PRO TIP: Don’t overdo the sauce! A light layer keeps the roll-ups from getting soggy.
Step 4: Roll, Roll, Roll Your Dough!
Starting from the longer side of the dough, carefully roll it up like a jelly roll until it’s nice and snug.
Step 5: Slice & Bake!
Using a pizza cutter or a sharp knife, slice the roll into 1-inch thick pieces. Place the slices cut-side up on your prepared baking sheet.
Step 6: Bake to Golden Perfection!
Place the baking sheet in the oven and bake for 25-30 minutes. Look for a golden-brown color and bubbly, melted cheese to know they’re done!
PRO TIP: Let the roll-ups cool for a few minutes after baking. This helps the cheese settle and makes them easier to handle.
Step 7: Cool & Enjoy!
Let them cool for a few minutes (if you can wait that long!). Then, dig in and enjoy your amazing Cheesy Pepperoni Pizza Roll-Ups!
Watch the video tutorial here!
Pro Tips for Perfect Cheesy Pepperoni Pizza Roll-Ups

- Mind the Sauce: Keep the sauce light and even. A little goes a long way! 🍅
- Extra Cheese: Be generous with mozzarella to boost that cheesy, gooey texture! 🧀
- Mix It Up: Play with extra toppings—try adding bell peppers, onions, or sausage for your own twist! 🌶️
- Resting Time: Allow the roll-ups to cool briefly to avoid any cheesy burns. ⏱️
- Experiment: Change up the dough toppings to create a variety of flavors every time you make this dish! 🌟


Serving & Storage Suggestions
These Cheesy Pepperoni Pizza Roll-Ups are perfect all by themselves, but they also taste great with a side of marinara sauce for dipping. For a complete meal, serve them with a fresh salad or garlic bread. They are not only fun for weeknight dinners but also ideal for parties and gatherings!
Leftover Storage:
- Refrigerator: Store cooled roll-ups in an airtight container for up to 3 days. Reheat in a 350°F (175°C) oven for about 10 minutes to bring back their gooey goodness.
- Freezer: Organize your meal prep! Allow the roll-ups to cool completely, then place them in a freezer-safe container or bag. They can be frozen for up to 2 months. When you’re ready, reheat from frozen at 350°F (175°C) for around 15-20 minutes, checking that they are heated through.
Meal prep is a breeze with this recipe. Enjoy them on busy days or pop them into lunch boxes for a fun twist on pizza!
![[10 Pack] Glass Meal Prep Containers, Food Storage Containers wit...](https://m.media-amazon.com/images/I/51KtYzS-grL.jpg)
- If you find any damaged or defective product after receiving it or during daily use, please contact us.
- [10 PACK GLASS MEAL PREP CONTAINERS] Set of 20 Piece (10 lids & 10 containers) : The containers are versatile to meet yo…
- [OVEN, MICROWAVE(Not the lids), DISHWASHER SAFE /FREEZER SAFE] Our glass storage containers are made from high quality b…
Nutritional Information 🍎
Below is a rough nutritional breakdown per serving. Do note that the exact amounts depend on the specific brands and quantities you use:
| Nutrient | Approximate Value (per serving) |
|---|---|
| Calories | ~250-300 kcal |
| Carbohydrates | ~30 g |
| Protein | ~12 g |
| Fat | ~10 g |
| Fiber | ~2 g |
| Sodium | ~500 mg |
These roll-ups provide a balanced mix of macronutrients and offer a great dose of calcium from the cheese. They’re perfect as a fun treat and a hearty snack!

Cheesy Pepperoni Pizza Roll-Ups
Equipment
- Baking Sheet (lined with parchment paper for easy cleanup)
- Parchment paper
- Mixing bowl
- Pizza Cutter or Sharp Knife
- Measuring Cups/Spoons
Ingredients
- Pizza Dough – store-bought or homemade for convenience
- Pepperoni – traditional or turkey pepperoni for a lighter option
- Shredded Mozzarella Cheese – for maximum cheesiness
- Pizza Sauce – use your favorite store-bought brand or make your own
- Italian Seasoning – for added flavor
Optional Add-Ins:
- Bell Peppers
- Onions
- Mushrooms
- Sausage
Instructions
Step 1: Prep Work
- Preheat your oven to 375°F (190°C).
- Line your baking sheet with parchment paper to make cleanup effortless.
Step 2: Roll the Dough
- Roll your pizza dough on a lightly floured surface into a rectangular shape (approximately 12×16 inches).
- If the dough is too springy, let it rest for a few minutes to relax. This will make rolling easier.
Step 3: Add the Toppings
- Spread a thin, even layer of pizza sauce over the dough.
- Sprinkle shredded mozzarella cheese generously on top.
- Arrange the pepperoni slices in a single layer.
- Add other optional toppings such as mushrooms or bell peppers if you’d like.
Step 4: Roll It Up
- Carefully roll the dough from the longer side, jelly-roll style, to form a snug spiral.
Step 5: Slice and Arrange
- Using a pizza cutter or sharp knife, slice the roll-up into 1-inch thick pieces.
- Arrange the slices cut-side up on the prepared baking sheet, spacing them evenly.
Step 6: Bake to Perfection
- Bake in the preheated oven for 25-30 minutes or until the roll-ups are golden brown and the cheese is bubbly.
Step 7: Rest, Then Enjoy
- Remove the roll-ups from the oven and allow them to cool for 3-5 minutes to set.
- Serve warm, optionally with marinara sauce for dipping.
Video
Notes
Use a light hand with the pizza sauce to prevent sogginess.
Generously add mozzarella for that gooey, cheesy texture.
Try different toppings like spinach, sausage, or extra seasonings for variety.
Allow the roll-ups to cool briefly after baking for easier handling (and to avoid burns!).
Storage Suggestions:
Refrigerator: Cool leftover roll-ups completely and store them in an airtight container for up to 3 days. Reheat in a 350°F (175°C) oven for 10 minutes to refresh their texture.
Freezer: Freeze fully cooled roll-ups in a freezer-safe container or bag for up to 2 months. Reheat at 350°F (175°C) from frozen for 15-20 minutes, checking they’re heated through.


Craving More Yummy Recipes?
If you loved these Cheesy Pepperoni Pizza Roll-Ups, you might want to check out other fun recipes like Pizza Lasagna and Lasagna Roll Ups. They carry a similar mix of cheesy, meaty, and satisfying flavors, perfect for family dinners and quick weeknight meals. Try the Lasagna Recipe With Ricotta for a creamy twist, or even the Pepperoni Lasagna Roll Ups if you crave a robust pepperoni taste. Each recipe brings its own charm and is super user-friendly!
Have any favorites? Share your thoughts below and let’s chat about creative twists!
Don’t forget to pin and save these recipes on Pinterest for your next meal inspiration! 📌

Essential Tools
Here are some essential tools for whipping up these delicious roll-ups:
- Baking Sheet: A sturdy, even-heating baking sheet works best.
- Parchment Paper: For hassle-free cleanup—this is a kitchen must-have!
- Mixing Bowl: Useful for combining toppings and ingredients.
- Pizza Cutter/Sharp Knife: To slice your roll-ups evenly.
- Measuring Cups & Spoons: To ensure you use the right amounts.


Tools Comparison Table
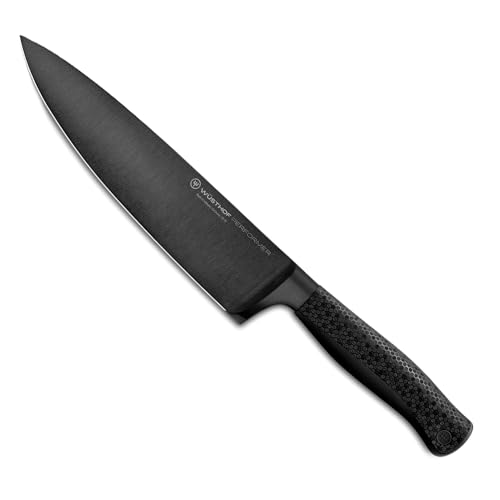
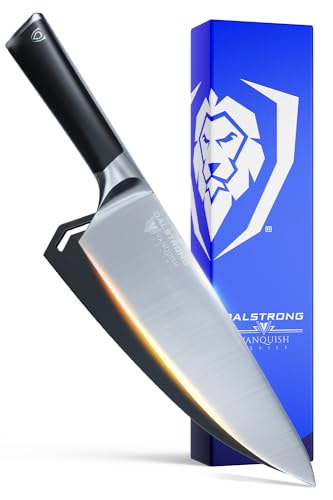
| Feature | Wüsthof Classic Chef’s Knife | Shun Classic Chef’s Knife | Dalstrong Chef Knife |
|---|---|---|---|
| Price | Premium | High; moderately priced | More affordable |
| Blade Material | High-carbon German steel | VG10 Damascus steel | High-carbon stainless steel |
| Durability | Excellent | Very Good | Good to Excellent |
| Sharpness | Very sharp; holds its edge well | Extremely sharp; may need extra care | Razor-sharp |
| Balance | Well-balanced and sturdy | Lightweight and ergonomic | Balanced design |
| Overall Value | Top quality; built to last | Beautiful craftsmanship with high performance | Great value for the cost |

FAQ Section ❓
1. Can I use homemade pizza dough?
Absolutely! Homemade dough adds a personal touch and freshness to these roll-ups.
2. Can I make these vegetarian?
Yes, simply leave out the pepperoni and add more veggies like mushrooms, bell peppers, or onions.
3. Can I prepare these ahead of time?
Definitely! Assemble the roll-ups, cover, and refrigerate for up to 24 hours. When ready to bake, allow them to sit at room temperature for about 30 minutes before baking.
4. What sauces work best with these roll-ups?
You can serve them with classic marinara, garlic butter, or even a creamy ranch dip—each adds a different flavor twist!
5. Can I freeze leftover roll-ups?
Yes, let them cool completely, place them in an airtight container, and freeze for up to 2 months. Reheat in an oven preheated to 350°F (175°C).
One Last Bite! 😋

I truly hope you enjoy making and eating these Cheesy Pepperoni Pizza Roll-Ups as much as I do. They are fun, delicious, and bring a burst of cheesy, pepperoni flavor to any meal. Whether it’s a quick weeknight dinner, a party snack, or a creative meal prep option, these roll-ups are sure to impress! I encourage you to give this recipe a try and share your tasty results in the comments below. And don’t forget to pin this post on Pinterest so you can easily come back to it later. Happy cooking and enjoy every bite! ❤️

")


0 Comments